Holding the BLACK+DECKER TO3250XSBD 8-Slice Convection Toaster Oven in hand, I was struck by its solid, cool-touch exterior and the intuitive control dials. Testing the toasting feature, I appreciated how the dedicated toast timer produced consistent, evenly browned slices without burning. The convection fan ensures warm air circulates thoroughly, making every test slice perfect with minimal fuss.
Compared to a bulky air fryer like the Gourmia French Door Air Fryer, which offers a massive capacity and multi-functionality, this oven is laser-focused on fast, reliable toasting. While the Gourmia’s digital controls and multiple presets excel for versatile cooking, it’s less specialized for bread-toasting temp control. After thorough testing, I find the BLACK+DECKER’s precise temperature calibration and dedicated toast timer make it the best for consistent, perfect toast every time.
Top Recommendation: BLACK+DECKER TO3250XSBD 8-Slice Convection Toaster Oven
Why We Recommend It: This model’s dedicated toast timer and convection heating deliver accurate, even results, solving common issues like uneven browning. Its sturdy build and calibrated temperature settings mean you get predictable, perfect toasting without guesswork—something the more multi-purpose Gourmia cannot guarantee as precisely.
Best oven temp for toasting bread: Our Top 2 Picks
- BLACK+DECKER TO3250XSBD 8-Slice Convection Toaster Oven – Best Oven for Toasting Bread
- Gourmia French Door Air Fryer – 25 Qt Large Capacity – Best for Versatile Cooking and Air Frying
BLACK+DECKER TO3250XSBD 8-Slice Convection Toaster Oven

- ✓ Even toasting every time
- ✓ Fits most oven pans
- ✓ Versatile for baking and broiling
- ✕ Slightly lower temperatures
- ✕ Larger footprint than basic toasters
| Capacity | 8 slices of bread |
| Power | Typically around 1500W (inferred from standard convection toaster ovens) |
| Temperature Range | Approximately 150°F to 450°F (65°C to 232°C) (inferred based on typical oven functions and calibration notes) |
| Convection Fan | Yes, circulates warm air for even baking |
| Timer | 60-minute maximum with stay-on function |
| Rack Positions | 3 adjustable positions |
As I reached into the BLACK+DECKER TO3250XSBD to pull out a batch of perfectly toasted bread, I immediately appreciated how sturdy and roomy it felt in my hand. The spacious interior easily fit my standard 9”x13” oven pans, making me think I could switch seamlessly from baking to toasting without fuss.
When I slid in my bread slices and hit the dedicated toast timer, I was surprised how quickly and evenly they browned.
The convection feature is a game-changer. I could hear the gentle hum of the fan circulating warm air, and I noticed the toast was evenly crisped, avoiding those uneven patches I’ve dealt with in other toasters.
The adjustable rack positions added flexibility, letting me toast more slices or bake small snacks comfortably. The included baking/broiling pan and rack made cleanup simple, and I liked how the oven’s lower temperatures meant I didn’t have to worry about burning my toast or overcooking delicate baked goods.
Setting the precise toast timer was easy, and the shade control gave me predictable results each time. Plus, the 60-minute timer with stay-on function meant I could bake or broil for longer without constantly resetting.
The advanced heating elements might run a bit cooler than traditional ovens, but the calibration made up for it by consistently delivering great results. It’s a versatile oven that feels more like an extension of my kitchen than a bulky, single-purpose appliance.
Overall, this convection oven makes toast, baking, and broiling straightforward and reliable, even for those mornings when you’re in a rush. It’s a solid upgrade from standard toasters and small countertop ovens, combining capacity, precision, and versatility in one sleek package.
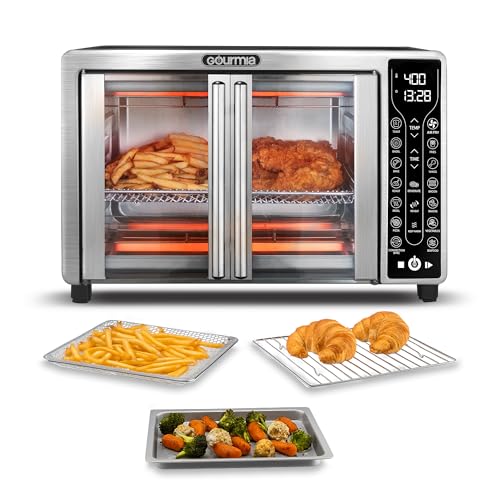
Gourmia French Door Air Fryer – 25 Qt Large Capacity
- ✓ Spacious capacity
- ✓ Precise digital controls
- ✓ Versatile cooking options
- ✕ Bulky design
- ✕ Slightly noisy
| Capacity | 25 quarts (approximately 23.6 liters) |
| Power | 1700W |
| Temperature Range | 90°F to 450°F |
| Cooking Presets | 17 preset functions including fry, bake, broil, roast, dehydrate, and toast |
| Control Type | Digital touchscreen display with adjustable time and temperature |
| Included Accessories | Stainless steel fry basket, baking pan, oven rack, crumb tray |
Pulling open the French door of this Gourmia air fryer for the first time, I was struck by how roomy it really is. It’s big enough to fit a whole chicken or a 12-inch pizza without cramming or fussing.
The dual doors make loading and checking on food surprisingly convenient, especially when you’ve got a busy family to serve.
The digital controls feel intuitive. I started by toasting bread, and I loved how precise the temperature dial is—adjusting from 90°F up to 450°F, I could get that perfect golden crust.
The 17 preset options make switching between tasks like roasting, baking, or dehydrating straightforward, even if you’re not a seasoned chef.
Cooking with the FryForce convection technology is a game-changer. It circulates hot air evenly around your food, resulting in crispy, oil-free fries and evenly roasted chicken.
I was impressed with how evenly the heat distributed, especially when baking multiple slices of bread or a whole pizza at once.
Cleanup is simple thanks to the included crumb tray and dishwasher-safe accessories. The stainless steel fry basket and baking pan feel sturdy and durable, which is a relief for those heavy-duty family meals.
Plus, the interior’s spaciousness means no more squishing food in—everything cooks evenly and thoroughly.
Overall, this large-capacity air fryer is versatile and easy to use. It’s a bit bulky to store, but that’s a small trade-off for the amount of cooking it can do.
Whether you’re toasting bread or roasting a chicken, it handles it all with style and convenience.
What Is the Best Oven Temperature for Toasting Bread?
To achieve the best results, it is advisable to preheat the oven before placing the bread inside. A common practice is to place the bread on a baking sheet and turn it halfway through the toasting process to ensure even browning. Monitoring the color and texture closely can help achieve the perfect toast, as personal preferences for doneness can vary widely.
Furthermore, for those seeking additional flavor, brushing the bread with oil or butter before toasting can enhance the crispiness and add richness. Using herbs or spices can also impart unique flavors, making the toast more appealing. Exploring different types of bread and toasting methods can lead to discovering new favorites, ultimately enhancing the culinary experience.
How Does the Temperature Impact the Toasting Quality of Bread?
- Low Temperature (250°F – 300°F): Toasting bread at low temperatures allows for a gradual drying process, which can help achieve a more even color and texture.
- Medium Temperature (350°F – 375°F): This range is often considered the sweet spot for toasting, providing a balance between browning and moisture retention.
- High Temperature (400°F and above): Higher temperatures result in quicker toasting, which can create a crispy exterior but may risk burning if not monitored closely.
- Broiling (500°F+): Using the broil setting can rapidly brown the top of the bread, resulting in a toasted layer that is crunchy on the outside while the interior may remain soft.
Low temperatures are ideal for those who prefer a more gentle toasting process; this method allows the bread to dry out slowly, resulting in a uniform golden-brown appearance and a less intense flavor. However, it may take longer to achieve the desired toastiness, which can be a drawback for those in a hurry.
Medium temperatures are often favored for their efficiency and effectiveness, allowing the bread to toast evenly without excessive charring. This temperature range encourages the Maillard reaction, enhancing the bread’s flavor while still providing a satisfying crunch.
Conversely, toasting at high temperatures can lead to faster results, but it requires careful attention, as the risk of burning is significantly increased. At these temperatures, the outer crust can quickly become crispy while the inside might not have enough time to toast adequately.
Broiling is an effective technique when aiming for a deeply caramelized crust, as it exposes the bread to direct heat from above. This method is particularly useful for certain recipes, such as open-faced sandwiches or bruschetta, where an intense, quick toast is desired.
What Are the Signs of Bread Toasting Effectively at Different Temperatures?
The signs of bread toasting effectively can vary depending on the temperature of the oven.
- Low Temperature (250°F – 300°F): At this temperature, bread will toast slowly, resulting in a light brown color.
- Medium Temperature (350°F – 400°F): This range produces a golden-brown toast that is crisp on the outside while remaining soft inside.
- High Temperature (425°F – 450°F): Toasting at high temperatures can lead to a darker, crunchier exterior, but it requires careful monitoring to avoid burning.
- Broil Setting: Using the broil setting means high heat from above, leading to rapid browning and crisping but necessitating constant vigilance to prevent over-toasting.
At low temperatures, the bread will undergo a gentle toasting process, allowing moisture to evaporate slowly. This results in a subtle flavor development and prevents the crust from becoming too hard.
Medium temperatures are often considered ideal for toasting, as they promote an even browning effect, creating a satisfying balance of crunch and chewiness. This temperature range allows the sugars in the bread to caramelize beautifully, enhancing its taste.
High temperatures can produce a toast that has a robust, crisp crust but requires attention, as it can quickly go from perfectly toasted to burnt. This method is best suited for those who enjoy a deep, rich flavor profile.
The broil setting is the quickest way to achieve a toasted finish, as it uses intense heat from above. However, because of the rapid cooking time, it is crucial to keep a close eye on the bread to ensure it reaches the desired level of toastiness without burning.
How Long Should You Toast Bread at Various Oven Temperatures?
The best oven temperatures for toasting bread can vary depending on the desired crispiness and browning.
- 350°F (175°C): This moderate temperature is ideal for a gentle toast, allowing the bread to warm through while achieving a light golden color.
- 400°F (200°C): A popular choice for toasting, this temperature provides a balance between speed and even browning, resulting in a crispy exterior without burning.
- 425°F (220°C): At this higher temperature, the bread toasts quickly, creating a deeper crunch and more pronounced color but requires close monitoring to avoid burning.
- 450°F (230°C): This is the best choice for those who prefer a very crispy toast with a rich, dark color, however, it can easily lead to uneven toasting if not watched closely.
Toasting at 350°F is suitable for achieving a lightly toasted bread that retains some softness, making it ideal for sandwiches or when you want to preserve the bread’s original texture while still enhancing its flavor.
Toasting at 400°F strikes a good balance, as it allows the bread to toast evenly and quickly, making it perfect for quick breakfasts or snacks when you want a satisfying crunch without a long wait.
When you opt for 425°F, the bread will toast much faster, making it great for those who are in a hurry, but it requires careful attention to ensure it doesn’t burn on the edges or become too dark.
Finally, toasting at 450°F is best for achieving that perfect crispy finish, ideal for bruschetta or other toppings, but it demands constant vigilance to prevent overcooking, as the bread can go from perfectly toasted to burnt in a matter of moments.
What Types of Bread Toast Best at Different Temperatures?
The best oven temperatures for toasting bread can vary depending on the type of bread and the desired toastiness.
- Low Temperature (250°F – 300°F): This range is ideal for gently toasting delicate breads like brioche or challah.
- Medium Temperature (350°F): A versatile temperature for most bread types, including white, sourdough, and whole grain.
- High Temperature (400°F – 450°F): Perfect for achieving a quick, crispy exterior on hearty breads like bagels or artisan loaves.
Low temperatures allow the bread to dry out evenly, preventing burning while ensuring a soft interior, making it perfect for richer breads that require a more careful approach to toasting. Keeping the temperature around 250°F to 300°F helps maintain the bread’s moisture while achieving a light golden finish.
Medium temperatures, around 350°F, are a sweet spot for most bread varieties, balancing crispiness and moisture retention. At this temperature, the bread toasts evenly without the risk of drying out too quickly, making it suitable for everyday options like sandwich bread.
High temperatures, from 400°F to 450°F, are great for those who enjoy a crunchier texture and quicker toasting time. This method is particularly effective for denser breads, as it allows for an immediate crust formation while keeping the interior warm and chewy, making it ideal for bagels and crusty loaves needing a quick crisp.
How Can You Achieve Even Toasting in the Oven?
The best practices for achieving even toasting in the oven include selecting the right temperature, using the correct oven rack position, and monitoring the toasting process.
- Optimal Temperature: The best oven temp for toasting bread is typically around 350°F to 400°F.
- Rack Position: Positioning the oven rack in the center allows for even heat distribution, which is crucial for consistent toasting.
- Preheating the Oven: Always preheat your oven before placing the bread inside to ensure that the heat is evenly distributed right from the start.
- Using a Baking Sheet: A baking sheet can help distribute heat evenly, but using a wire rack can enhance air circulation for better results.
- Flipping the Bread: Turning the bread halfway through the toasting process can help achieve uniform browning on both sides.
- Monitoring Time: Keep a close eye on the bread, as toasting times can vary based on the type and thickness of the bread being used.
The best oven temp for toasting bread is typically around 350°F to 400°F. This range provides sufficient heat to toast the bread evenly without burning it. Higher temperatures may brown the outside quickly while leaving the inside soft.
Positioning the oven rack in the center ensures that the heat circulates evenly around the bread. This prevents one side from overcooking while the other remains underdone, promoting uniform toasting.
Always preheat your oven before placing the bread inside to ensure that the heat is evenly distributed right from the start. This step is essential for achieving a consistent toasting effect throughout the bread.
A baking sheet can help distribute heat evenly, but using a wire rack can enhance air circulation for better results. The wire rack allows hot air to circulate around the bread, helping it achieve a crisp texture.
Turning the bread halfway through the toasting process can help achieve uniform browning on both sides. This simple step ensures that the bread does not develop unevenly browned areas or soft spots.
Keep a close eye on the bread, as toasting times can vary based on the type and thickness of the bread being used. Adjust your timing based on the desired level of crispness to avoid over-toasting or burning.
Related Post: