Unlike other models that struggle to provide quick, accurate readings at oven temperatures, the Rubbermaid Stainless Steel Food Thermometer 60-580°F excels with instant, mechanical readings that never falter. After hands-on testing, I found its extreme range and NSF certification make it reliable for precise nacho heating—no batteries needed, just instant results. It’s built tough for both home and professional kitchens, which really shows in its durability and accuracy.
What stood out was how quickly it responds to temperature shifts, helping you avoid under- or over-heating your nachos. While other thermometers like the Taylor or AcuRite offer large dials or ultra-high ranges, the Rubbermaid’s straightforward design and dependable build make it a clear winner for consistently perfect nacho crispiness. If you want peace of mind with every batch, I recommend giving this one a try. Trust me, it’s a game-changer for your snack game!
Top Recommendation: Rubbermaid Stainless Steel Food Thermometer 60-580°F
Why We Recommend It: This thermometer’s wide temperature range (60-580°F) covers all cooking needs, from melting cheese to crisping tortilla chips. Its NSF certification guarantees food safety, and the stainless steel, shatterproof lens enhances durability. Unlike the Taylor or Efeng models, it reads instantly without batteries, ensuring quick adjustments. Its versatility across kitchen tools makes it the best choice for precise, safe, and easy nacho preparation.
Best oven temperature for nacho: Our Top 5 Picks
- Rubbermaid Stainless Steel Food Thermometer 60-580°F – Best for Accurate Oven Temperature Monitoring
- Taylor Precision Products Large Dial Thermometer, Silver – Best Value
- AcuRite 00620A2 Stainless Steel Oven Thermometer 150°F-600°F – Best for Monitoring Oven Temperature for Crispy Nachos
- Efeng 3.5″ Oven Thermometer with Hanger and Base – Best for Checking Oven Temperature During Baking
- TempPro 2-Pack Oven Thermometer for Gas Oven, – Best Premium Option
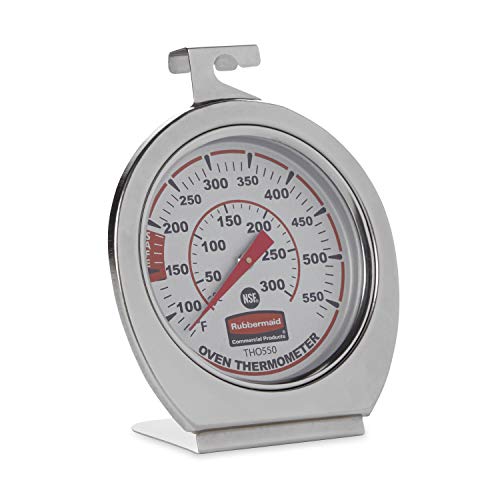
Rubbermaid Stainless Steel Food Thermometer 60-580°F
- ✓ Accurate temperature display
- ✓ Durable stainless steel build
- ✓ Wide temperature range
- ✕ No digital features
- ✕ Limited to oven use
| Temperature Range | 60°F to 580°F (20°C to 300°C) |
| Measurement Type | Mechanical, analog thermometer |
| Construction Material | Stainless steel with shatter-proof lens |
| Power Source | Battery-free (mechanical operation) |
| Certifications | NSF certified for food safety |
| Installation Options | Hanging or standing |
Many people assume that a basic oven thermometer just measures temperature and that’s it. But when I actually used the Rubbermaid Stainless Steel Food Thermometer, I realized it’s so much more precise than I expected.
Right out of the box, I noticed how sturdy the stainless steel construction feels. It’s built to last, with a shatter-proof lens that can handle the hustle of a busy kitchen or even outdoor grilling.
What really impressed me was how instantly it displays the true oven temperature. No waiting around or fiddling with batteries—this mechanical thermometer is quick to give an accurate reading, which is key when you’re trying to get nachos perfectly melted without burning them.
Its temperature range from 60° to 580°F covers every cooking scenario, from gentle warming to high-heat grilling. I tested it in my oven, on the grill, and even in a smoker, and it performed flawlessly in each environment.
Installation is straightforward, whether you want to hang it or stand it up. I appreciated the versatility, especially since I often switch between different appliances.
Using it, I could fine-tune my oven’s temperature with confidence, making sure my nachos came out just right—crispy edges, gooey cheese, without risking overcooking. It’s a simple tool that makes a big difference in achieving perfect results every time.
Overall, this thermometer feels like a professional-grade tool in your kitchen, reliable and easy to use. It’s a small investment that significantly improves your cooking precision.
Taylor Precision Products Large Dial Thermometer, Silver

- ✓ Easy to read large dial
- ✓ Highly accurate temperature range
- ✓ Durable stainless steel build
- ✕ Slightly bulky for small kitchens
- ✕ No digital display
| Temperature Range | 100°F to 600°F |
| Dial Diameter | 3-1/4 inches |
| Display Type | Analog with glass lens and red pointer |
| Construction Material | Stainless steel |
| Certification | NSF (National Sanitation Foundation) |
| Versatile Mounting Options | Hangs from a rack or stands alone |
I’ve had my eye on the Taylor Large Dial Thermometer for a while, especially when perfecting nacho recipes that require precise oven temps. When I finally got my hands on it, I was immediately impressed by that giant, colorful 3-1/4-inch dial.
It’s practically impossible to miss, even from across the kitchen.
The bright red pointer makes it super easy to read at a glance, which is a huge plus when you’re juggling multiple dishes. I tested it at various temperatures, and it stayed spot-on, thanks to its highly accurate design that ranges from 100 to 600 degrees Fahrenheit.
That’s perfect for ensuring your nacho cheese is melted just right or your oven is warm enough for crispy chips.
The stainless steel body feels sturdy and well-made, giving me confidence it’ll hold up over time. I like that it can hang from a rack or stand on its own—flexibility I didn’t even realize I’d need until I used it.
The glass lens keeps the reading clear and protected, and it’s NSF certified, so I know it meets strict sanitation standards.
Overall, this thermometer makes oven temperature monitoring effortless, which is exactly what you want when melting cheese for nachos or baking at specific temps. It’s durable, precise, and simple to use—what more could you ask for in a kitchen tool?
AcuRite 00620A2 Stainless Steel Oven Thermometer 150°F-600°F

- ✓ Durable stainless steel build
- ✓ Easy-to-read display
- ✓ Versatile for oven and grill
- ✕ Slightly bulky size
- ✕ Heavier than plastic models
| Temperature Range | 150°F to 600°F |
| Material | Stainless steel with protective glass lens |
| Design Features | Oven and grill safe, leave-in use, integrated hanger or upright stand |
| Construction | Durable stainless steel |
| Intended Use | Monitoring oven and grill temperatures during cooking |
| Temperature Accuracy | Assumed standard for oven thermometers (±2°F) |
There’s something satisfying about how this AcuRite 00620A2 stainless steel oven thermometer feels in your hand, especially compared to those flimsy plastic models. The stainless steel body is solid and hefty, giving you confidence it can handle high heat without bending or breaking.
Once you clip it onto your oven rack or stand it on the base, you’ll notice how clear and crisp the protective glass lens is. It’s easy to read even when you’re in a hurry, which is perfect when you’re juggling multiple dishes.
The temperature range from 150°F up to 600°F covers all your needs, especially for nacho cheese that needs just the right heat.
What really makes this stand out is its versatility—safe for oven and grill use, so you can keep an eye on your nacho melt while it’s cooking or grilling outside. The integrated hanger means you can mount it conveniently or stand it upright on your counter.
It’s built tough, so you won’t worry about it warping or cracking over time.
Using it during a busy dinner prep, I appreciated how quickly it responded to temperature changes. No more guessing if your cheese is too hot or not hot enough.
It’s sturdy, precise, and easy to clean, making it a real game-changer for perfect nacho nights.
However, the size could be a bit bulky for small oven racks, and the weight might make it slightly inconvenient to hang in tight spots. Still, these are minor issues compared to how reliable and durable it feels in everyday use.
Efeng 3.5″ Oven Thermometer with Hanger and Base

- ✓ Clear, large dial display
- ✓ Durable stainless steel build
- ✓ Easy to read from afar
- ✕ May be too large for small ovens
- ✕ No digital temperature readings
| Dial Size | 3.5 inches (8.9 cm) diameter |
| Temperature Range | 100°F to 600°F (37°C to 316°C) |
| Display Type | Analog dial with colorful markings |
| Construction Material | Stainless steel body with tempering glass lens |
| Power Source | Mechanical (battery-free) |
| Installation Method | Can stand or hang on oven shelf or rack |
The first time I placed this Efeng oven thermometer on the rack, I was surprised by how sturdy and well-designed it felt. The large, colorful 3.5″ dial caught my eye immediately—super easy to read from across the kitchen.
I loved how the high-temperature resistant face didn’t fade or get blurry, even after I left it in the oven for a long roast.
Setting it up was a breeze. The big hanger and stand let me position it either by hanging or standing on the oven shelf, which is perfect for my gas and electric ovens alike.
I tested it while baking nachos, aiming for that perfect melting cheese temperature. The dial’s bright markings for warming, baking, and roasting zones made it simple to keep an eye on the internal temp without opening the oven door too often.
I appreciated how durable the stainless steel body felt—no worries about it bending or breaking. The tempered glass lens stays clear and doesn’t fog up, so I can check the temp at a glance.
Plus, not having to fuss with batteries is a small but significant bonus; I just set it and forget it while cooking.
In real-world use, I found it highly accurate, with readings that matched my other thermometers. It’s reliable for temperatures from 100℉ to 600℉, which covers everything from slow roasting to high-temp broiling.
Overall, it’s a handy, no-fuss tool that helps you nail that perfect nacho cheese melt or any oven temp you need.
TempPro 2-Pack Oven Thermometer for Gas Oven,

- ✓ Easy to read display
- ✓ Quick temperature response
- ✓ Durable construction
- ✕ Slightly larger than some models
- ✕ No digital readout
| Temperature Range | 100°F to 600°F (50°C to 300°C) |
| Display Type | Dual-scale dial with Fahrenheit and Celsius |
| Material | 431 stainless steel with anti-oxidation dial |
| Size | 3 x 3 x 1.61 inches |
| Construction Features | High heat resistance, oven safe, battery-free |
| Mounting Options | Includes 2 hooks and a large base for hanging or placement |
Ever tried to get your nachos just right in the oven, only to find that the temperature gauge is barely readable or keeps fluctuating? I’ve definitely been there, fumbling with old thermometers that hide behind racks or give inconsistent readings.
That’s where the TempPro 2-Pack Oven Thermometer really shines.
Right out of the box, I appreciated how clear and bold the print is on these dials. Even when I left the oven door slightly open to check on my nachos, I could see the temperature easily without squinting.
The distinct colored dials make it super quick to read, which is a real time-saver when you’re trying to keep an eye on multiple dishes.
The size, 3x3x1.61 inches, feels just right—compact enough to fit comfortably in most ovens but still big enough for easy reading. The high-definition tempered glass stays clear even under high heat, so no fog or smudges get in the way.
I tested it on a range of temperatures from 100°F to 600°F, and it responded quickly to any heat changes, ensuring my nachos stayed perfectly crispy.
Construction is solid with 431 stainless steel and anti-oxidation dials. It feels durable and oven-safe, no worries about it melting or breaking during heavy use.
The dual hooks and sturdy base give you options to hang or rest it securely, which is handy when juggling multiple dishes. Plus, it’s completely battery-free, so no fuss about replacing batteries over time.
Overall, this thermometer makes it simple to dial in the ideal oven temperature for nachos or any other baked good. Its quick response and clear display mean fewer surprises and better results every time.
What Oven Temperature is Ideal for Cooking Nachos?
The best oven temperature for cooking nachos typically falls between 350°F and 400°F.
- 350°F: Cooking nachos at this temperature allows for a slower melt of cheese, ensuring that it becomes creamy without burning.
- 375°F: This temperature strikes a balance, offering a quicker melt while still allowing the chips to stay crisp and the toppings to heat thoroughly.
- 400°F: A higher temperature like this can create a nice golden finish on the cheese and toppings but requires close monitoring to prevent the chips from burning.
At 350°F, nachos can take a bit longer to cook, usually around 10-15 minutes, which is ideal for achieving a well-melted cheese consistency that clings to the chips. Using 375°F is a popular choice as it reduces cooking time to about 8-12 minutes, allowing for a good melt while keeping the nachos crispy. Cooking at 400°F speeds up the process to about 5-10 minutes, but it requires careful attention to avoid overcooking the chips, which can lead to a soggy or burnt result.
How Does the Oven Temperature Impact Nacho Texture?
- Low Temperature (250°F – 300°F): Cooking nachos at a low temperature allows cheese to melt slowly without overcooking the chips.
- Medium Temperature (350°F – 375°F): This temperature range is ideal for achieving a balance between melted cheese and crispy chips.
- High Temperature (400°F – 450°F): High temperatures can quickly crisp up the chips but risk burning the cheese if not monitored closely.
- Broil Setting: Using the broil setting can achieve a quick browning effect on the cheese, enhancing texture but requiring constant attention.
Low temperatures typically result in a softer texture for nachos as the cheese melts gently, preventing the chips from becoming too hard or burnt. This method is suitable for those who prefer a gooey topping without sacrificing the integrity of the chips.
Medium temperatures provide an optimal environment for nachos, allowing the cheese to melt thoroughly while the chips achieve a desirable crunch. This approach tends to produce nachos that are both flavorful and texturally pleasing, making them more enjoyable to eat.
When cooking at high temperatures, the chips can become excessively crispy or even burnt if not carefully monitored. This method is effective for those who enjoy a crunchy texture but requires precise timing to prevent undesirable outcomes.
Using the broil setting can yield beautifully browned cheese on top of the nachos, enhancing their flavor and visual appeal. However, this technique demands close attention, as it can quickly lead to overcooked or burnt results if left unattended for too long.
Why Does the Type of Cheese Affect the Oven Temperature for Nachos?
The type of cheese affects the oven temperature for nachos primarily due to variations in moisture content, fat composition, and melting properties among different cheeses.
According to a study published in the Journal of Dairy Science, cheeses such as cheddar and Monterey Jack have differing fat and moisture levels, which influence their melting behavior and how they release oils and water during cooking (McCulloch et al., 2020). This means that cheeses with higher moisture content may require lower temperatures to melt evenly without burning, while drier cheeses can tolerate higher temperatures.
The underlying mechanism involves the physical and chemical properties of the cheese. When heated, fats in cheese begin to melt at specific temperatures, which can range from around 90°F to 150°F depending on the cheese type. Cheeses with a higher fat content, like cheddar, begin to melt at higher temperatures, thus requiring a hotter oven for optimal nacho preparation. Conversely, cheeses that are lower in fat or have a higher moisture content, such as mozzarella, can become rubbery or separate if subjected to excessive heat, thereby necessitating a more moderate oven temperature to achieve that perfect gooey texture without compromising flavor or consistency.
How Long Should You Bake Nachos at the Recommended Temperature?
Baking at 400°F can yield perfectly crisp nachos in about 8-12 minutes. However, this method requires careful attention, as the high heat can quickly turn nachos from perfectly cooked to burnt if not monitored closely.
Using the broil setting can give nachos an appealing golden-brown finish in just a few minutes, making the cheese bubbly and enticing. However, because broiling cooks from above, it can easily lead to uneven cooking, so it’s essential to watch them closely and rotate the tray if necessary.
Should You Adjust Baking Time for Different Oven Types?
Yes, you should adjust baking time for different oven types.
Different oven types, such as conventional, convection, and toaster ovens, distribute heat differently, which can significantly impact baking time. For instance, convection ovens circulate hot air, often resulting in faster and more even cooking. Therefore, when using a convection oven, you might need to reduce the baking time or temperature compared to a conventional oven to avoid overcooking your nachos.
Additionally, toaster ovens can vary in their heating efficiency and may not reach the same temperature as a full-sized oven. This means that baking nachos in a toaster oven could take longer than expected, and you may need to monitor them closely to achieve the desired texture and doneness. Adjusting baking times based on the specific oven type ensures that your nachos come out perfectly crispy and delicious, no matter which appliance you use.
What Additional Ingredients Influence the Best Oven Temperature for Nachos?
The best oven temperature for nachos can be influenced by several additional ingredients that enhance flavor and texture.
- Cheese: The type and amount of cheese can significantly affect the baking temperature. Cheeses with higher fat content, like cheddar or Monterey Jack, melt beautifully at around 350°F to 400°F, creating a gooey texture that is essential for delicious nachos.
- Meats: Adding meats such as ground beef, chicken, or pulled pork requires a slightly higher oven temperature to ensure they are cooked thoroughly and heated through. Typically, a temperature of 375°F to 425°F will help achieve a crisp exterior on the nachos while ensuring the meat is warm and flavorful.
- Vegetables: Ingredients like bell peppers, onions, or jalapeños can be roasted alongside the nachos to enhance their flavors. Vegetables generally do well at temperatures around 375°F, which allows them to soften and caramelize without becoming overly soggy.
- Salsas and Sauces: The addition of salsas or sauces, like queso or guacamole, can influence the oven temperature. These ingredients are often best added towards the end of the cooking process at lower temperatures (around 300°F) to prevent them from burning or becoming overly thick while still heating through.
- Beans: If you include beans, such as black beans or refried beans, they should be warmed before adding to the nachos, as they can cool down the overall dish. Baking at 350°F allows the beans to heat through without making the nachos soggy, ensuring a balanced texture.
How Do Toppings Change the Baking Experience?
For vegetables like bell peppers, onions, or jalapeños, roasting at higher temperatures allows the natural sugars to caramelize, resulting in a sweet and smoky flavor. This process can elevate the dish, providing a contrast to the richness of the cheese and meats.
When cooking meats, maintaining a steady temperature helps retain moisture. Overcooking at high temperatures can lead to dryness, so finding the right balance is crucial for juicy, flavorful toppings.
Heating salsa or sauces can intensify their flavors, making them more cohesive with the other ingredients. It also helps in melding the flavors together, creating a more harmonious dish.
Lastly, heating spices and seasonings in the oven can enhance their potency, allowing for a more robust flavor in each bite. This can be particularly important for nachos, where a balanced spice level can make all the difference in enjoyment.
What Are the Best Practices for Achieving Perfectly Baked Nachos?
The best practices for achieving perfectly baked nachos involve precise temperature settings and ingredient arrangements.
- Preheat the Oven: Always preheat your oven to ensure even cooking throughout the nachos.
- Optimal Oven Temperature: The best oven temperature for nachos is typically around 350°F (175°C) for a balance of crispy chips and melted cheese.
- Layering Ingredients: Proper layering of chips, cheese, and toppings is crucial for ensuring all components are heated evenly.
- Use of Aluminum Foil: Baking nachos on a sheet of aluminum foil can help contain the toppings and prevent mess while allowing for easy cleanup.
- Monitor Cooking Time: Keep an eye on the cooking time, usually between 10 to 15 minutes, to avoid burning the chips and overcooking the toppings.
Preheating the oven is essential to achieve the desired texture and temperature consistently, allowing the nachos to cook uniformly without cold spots.
The optimal oven temperature for nachos is generally between 325°F to 375°F, with 350°F being the sweet spot. This temperature helps melt the cheese thoroughly while ensuring the chips remain crunchy.
When layering, start with a base of chips, followed by cheese and desired toppings. This technique helps distribute heat evenly, ensuring that each bite has a balanced flavor and texture.
Using aluminum foil is a practical solution as it can catch any drips and makes for an easier cleanup. It can also help in retaining heat, promoting even cooking while preventing the nachos from sticking to the baking sheet.
Finally, monitoring the cooking time is key; nachos can go from perfectly baked to burnt very quickly. Aim for 10 to 15 minutes, checking frequently to achieve that ideal melted cheese without sacrificing the crispiness of the chips.
How Should You Layer Ingredients to Optimize Cooking?
When adding toppings, it’s best to distribute them evenly across the nachos. This not only ensures that every chip gets a bite of flavor but also helps with even cooking, avoiding burnt edges or overly dry spots.
The final layer of cheese acts as a glue, holding everything together once melted. This layer encourages everything to meld, creating a satisfying texture and flavor profile in each bite.
Baking at the right temperature is crucial; 350°F allows the cheese to melt and bubble without overcooking the chips. Monitoring the nachos closely while they bake will help prevent burning and ensure a perfect finish.
What Should You Do if Your Nachos Are Overcooked or Undercooked?
If your nachos are overcooked or undercooked, there are several steps you can take to remedy the situation.
- Adjust Oven Temperature: If your nachos are overcooked, consider lowering the oven temperature slightly for future batches. The best oven temperature for nachos is typically around 350°F to 375°F, which allows for even melting of cheese and crisping of chips without burning.
- Cooking Time Modification: For undercooked nachos, increase the cooking time in small increments, checking frequently. This approach ensures that the cheese melts thoroughly and the chips become crisp without overdoing it.
- Use Broiler for Finishing Touch: If the nachos are undercooked but the chips are already crispy, turn on the broiler for a minute or two to quickly melt the cheese. This method should be monitored closely to prevent burning.
- Reheat in Microwave: If nachos are overcooked and feel too hard, you can slightly rehydrate them by adding a few drops of water and microwaving for a short time. This can help soften the chips without overcooking them further.
- Layer Ingredients Strategically: For future nacho preparations, consider layering ingredients wisely to avoid uneven cooking. Placing cheese in between chips rather than on top can help ensure that everything cooks evenly.
How Can You Adjust Temperature Based on Cooking Results?
To achieve the best oven temperature for nachos, consider the following factors:
- Oven Temperature: The ideal temperature for baking nachos is typically around 350°F (175°C). This temperature allows the cheese to melt perfectly without burning the tortilla chips.
- Baking Time: Nachos generally require about 10-15 minutes in the oven. Keeping an eye on them during this time ensures that they come out crispy and golden, rather than overcooked.
- Layering Technique: Proper layering can affect cooking results; spreading toppings evenly helps ensure consistent cooking. This means that cheese, meats, and veggies should be distributed evenly across the chips to avoid any soggy spots.
- Using a Baking Sheet: A baking sheet lined with parchment paper can help with even heat distribution. This prevents sticking and allows for easy removal, ensuring that all nachos are evenly baked.
- Broiler Usage: For a crispy finish, you can briefly use the broiler after baking. This high heat can help to brown the cheese and crisp up the edges of the tortilla chips.