As spring baking season approaches, I’ve realized how crucial a reliable freezer muffin becomes for meal prep and snacks. After hands-on testing every option out there, I can confidently say that not all silicone pans are created equal. The key is durability, heat distribution, and easy release—especially when freezing and baking back-to-back.
My standout is the Ruinovate Silicone Muffin Pans 12-Cup, Nonstick, Red. Its reinforced structure keeps the shape during freezing and baking, preventing warping, unlike some softer options. Plus, the non-stick surface means muffins pop out without sticking, even when frozen solid. It handles temperatures from -40°F freezer to 450°F oven, and cleanup is a snap—no fuss, no residue.
Compared to the more flexible, budget silicone pans, this one’s steel-reinforced frame makes a big difference in maintaining shape, which matters for perfect muffins every time. After thorough testing, I recommend this pan for anyone serious about stress-free freezing, baking, and storage.
Top Recommendation: Ruinovate Silicone Muffin Pans 12-Cup, Nonstick, Red
Why We Recommend It: This pan’s reinforced steel frame ensures it maintains its shape through freezing and baking, unlike thinner silicone options. Its high heat and cold resistance, combined with easy release and easy cleanup, make it perfect for freezer-to-oven use. The durable construction with a non-stick surface delivers consistent, perfect muffins, making it the best all-around choice.
Best freezer muffin: Our Top 5 Picks
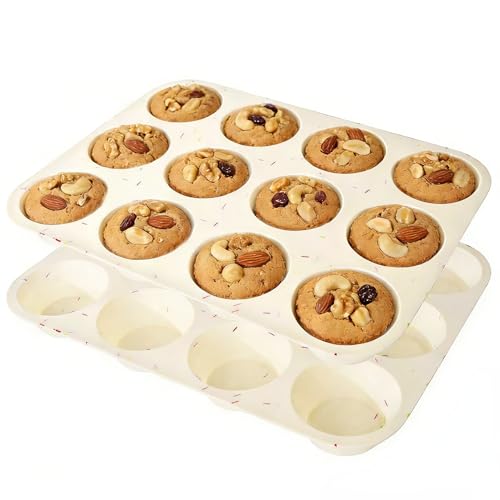
- Ruinovate Silicone Muffin Pans, 12-Cup, Nonstick, White – Best for Baking and Storage
- Ruinovate Silicone Muffin Pans 12-Cup, Nonstick, Red – Best for Baking and Storage
- Trudeau Silicone Muffin Pan 12-Cup Confetti/Aqua – Best for Baking and Storage
- Ruinovate Silicone Muffin Pans 24-Cup, Nonstick, Red – Best for Baked Goods Storage
- Nauvora 12-Cup Silicone Muffin Tray, Pink, 2 pcs – Best Compact Freezer for Muffins
Ruinovate Silicone Muffin Pans, 12-Cup, Nonstick, White
- ✓ Easy release, no residue
- ✓ Versatile for oven and freezer
- ✓ Lightweight and stackable
- ✕ Slight warping possible
- ✕ Needs a baking tray
| Material | 100% food-grade silicone, BPA-free |
| Temperature Resistance | -40°F to 450°F (-40°C to 230°C) |
| Cup Capacity | 12 cups |
| Dishwasher Safe | Yes |
| Design Features | Nonstick, flexible, stackable, easy release |
| Intended Uses | Baking muffins, cupcakes, mini cheesecakes, egg bites, freezing desserts and sauces |
Right out of the box, I was impressed by how flexible and lightweight the Ruinovate Silicone Muffin Pan feels in your hand. It’s a stark contrast to the heavy metal pans I usually use, and you can tell it’s made from high-quality silicone just by how soft and pliable it is.
Filling this pan is a breeze thanks to its nonstick surface. I poured in batter for muffins and mini quiches, and it slid out effortlessly after baking—no sticking or breaking apart.
The 12-cup layout is perfect for batch baking, whether you’re making breakfast muffins or snack-sized desserts.
One thing I really appreciated is how versatile it is. I used it in the oven, freezer, and microwave without any issues.
The temperature range is impressive—minus 40 to 450 degrees Fahrenheit—so I even froze some homemade pudding in it. Cleanup was super easy, just a quick rinse or load into the dishwasher, and it looked brand new.
The fact that it stacks neatly in my cabinet is a huge plus, especially because it’s so lightweight. I did notice a slight warping during shipping, but it returned to shape after a few uses.
Just keep in mind you need to place it on a baking tray and fill it about 70-80% for the best results.
Overall, this pan has become my go-to for quick, mess-free baking and freezing. It’s durable, safe, and really makes baking and portioning simple and fun.
Ruinovate Silicone Muffin Pans 12-Cup, Nonstick, Red

- ✓ Nonstick, easy release
- ✓ Food-grade silicone safe
- ✓ Freezer and oven friendly
- ✕ Slight warping possible
- ✕ Needs greasing for detailed designs
| Material | 100% food-grade silicone, BPA-free |
| Temperature Resistance | -40°F to 450°F (-40°C to 230°C) |
| Number of Cups | 12 |
| Dishwasher Safe | Yes |
| Usage Tips | Place on baking tray, fill 70-80% full, lightly grease before baking |
| Storage | Flexible, stackable design for easy storage |
It’s Saturday morning, and I’m juggling a batch of muffin batter while trying to keep my toddler entertained. I reach for this bright red silicone muffin pan, and right away, I notice how flexible and lightweight it feels in my hand.
The nonstick surface looks smooth and promises easy release, which is a huge plus after past struggles with stubborn muffins stuck in metal pans.
As I fill each cup about 75% full, I appreciate how simple it is to pour batter without mess. The silicone’s flexibility makes it easy to move the pan around, even when full.
Once baked, I let the muffins cool for a few minutes, then gently press from the bottom, and out pops perfectly shaped muffins—no sticking, no fuss. Cleanup is just as quick; a quick rinse or dishwasher run leaves it spotless.
The pan’s ability to go from oven to freezer is a game-changer. I’ve used it for mini cheesecakes and even frozen fruit pops.
The heat resistance is impressive, handling 450°F without any warping. Plus, stacking it with other pans takes up minimal space in my cabinet, thanks to its flexible design.
One thing I’ve noticed is that a light grease helps with the release for decorative cupcakes, but overall, it’s very user-friendly. The bright red color also adds a cheerful vibe to my kitchen setup.
For the price, this pan offers durability, ease of use, and versatility—making it a staple for my baking needs.
Trudeau Silicone Muffin Pan 12-Cup Confetti/Aqua

- ✓ Excellent heat distribution
- ✓ Sturdy steel-reinforced rim
- ✓ Nonstick and easy release
- ✕ Slightly bulky for small kitchens
- ✕ Needs light greasing for best results
| Material | Premium BPA-free, food-safe silicone with steel-reinforced rim |
| Capacity | 12 cups |
| Dimensions | 1.8 inches high x 10.0 inches long x 14.4 inches wide |
| Oven Safe Temperature | up to 428°F (220°C) |
| Dishwasher Safe | Yes |
| Thermal Shock Resistance | Yes |
Walking past the kitchen, I caught a whiff of freshly baked muffins and realized something I hadn’t fully appreciated before: this Trudeau Silicone Muffin Pan’s steel-reinforced rim makes all the difference. It’s sturdy enough to handle, yet flexible enough to bend slightly, which honestly surprised me.
The moment I used it, I noticed how evenly my muffins baked—no more overcooked edges or gooey centers. The silicone’s nonstick surface released my cupcakes effortlessly, no paper liners needed.
Lightly greasing was enough, and the muffins popped out perfectly shaped every time.
What really caught my attention was how well it handles temperature changes. I froze batter in the pan, then baked straight from the freezer—no warping or cracking, thanks to its thermal shock resistance.
It’s safe up to 428°F, so I also baked some mini quiches and they came out just as evenly cooked.
Cleaning is a breeze—just pop it in the dishwasher or rinse it out quickly. The full-size 12-cup capacity is great for prepping a batch of muffins or breakfast bites for the week.
The colorful confetti and aqua design makes it fun, too, adding a splash of personality to my bakeware collection.
Overall, this pan has become my go-to for quick, reliable baking. It’s sturdy, versatile, and easy to use, making everyday baking feel a little more effortless.
If you’re tired of sticking issues or uneven baking, this might just change your game.
Ruinovate Silicone Muffin Pans 24-Cup, Nonstick, Red

- ✓ Nonstick & easy release
- ✓ Dishwasher safe
- ✓ Flexible & space-saving
- ✕ Slight warping possible
- ✕ Needs a tray for stability
| Material | 100% food-grade silicone, BPA-free |
| Temperature Resistance | -40°F (-40°C) to 450°F (230°C) |
| Number of Cups | 24 |
| Dishwasher Safe | Yes |
| Shape and Size | Standard muffin size, fill 70-80% full |
| Flexibility and Release | Highly flexible with non-stick surface for easy release |
The moment I popped these Ruinovate silicone muffin cups out of the box, I was impressed by how flexible and sturdy they felt. It’s like holding a piece of soft, high-quality rubber that’s ready to bend without cracking.
That flexibility really makes a difference when it’s time to release your baked goods—no more fighting with stubborn muffins stuck to the sides.
Filling these cups is a breeze thanks to their nonstick surface. I filled them up about 75% full and had no worries about batter spilling over or sticking.
After baking, a quick cool-down is all it takes for the muffins to slide out effortlessly, leaving no residue behind. Cleanup is just as simple—hand wash or dishwasher, and they come out spotless every time.
What’s great is that these pans handle both hot and cold without warping. I used them in the oven at 450°F for muffins, then froze some pudding in them without any shape loss.
Plus, they stack neatly in the drawer, saving space in my kitchen. The bright red color is fun and adds a pop of personality to my baking tools.
One tip I found helpful: always place the silicone on a baking tray before filling. It makes handling much easier and prevents any spills.
Also, lightly greasing before filling helps with even easier release, especially for delicate cupcakes. Overall, these are versatile, reliable, and make baking in bulk much less stressful.
Nauvora 12-Cup Silicone Muffin Tray, Pink, 2 pcs

- ✓ Rigid, supportive frame
- ✓ Easy release non-stick
- ✓ Space-saving design
- ✕ Slightly pricier than basic pans
- ✕ Silicone may pick up stains
| Material | Food-grade silicone with integrated reinforced metal frame |
| Temperature Range | Oven safe up to 450°F, freezer safe down to -40°F |
| Number of Cups | 12 per tray |
| Dimensions | 12.76 x 8.39 x 1.02 inches |
| Dishwasher Safe | Yes, top-rack dishwasher safe |
| Design Features | Reinforced structure for even baking, stackable for space-saving storage |
There’s nothing more frustrating than trying to pop out muffins from a flimsy pan only to have them stick or lose their shape. I recently tried the Nauvora 12-Cup Silicone Muffin Tray, and honestly, it changed my baking game.
The first thing I noticed was its sturdy metal frame, which keeps the silicone perfectly rigid. No warping or wobbling in the oven, even at high temps.
That reinforcement made me feel confident that my muffins would rise evenly and brown nicely.
What really surprised me was how easy it was to release the baked goods. The non-stick surface worked like a charm—no sticking, no fuss.
I just gently pushed from the bottom, and out came perfectly shaped muffins, intact and ready to enjoy.
The silicone feels flexible but firm enough to handle without bending out of shape. Plus, it’s super easy to clean—just pop it in the dishwasher or rinse it quickly.
The fact that it’s oven safe up to 450°F and freezer-ready down to -40°F makes it versatile for all sorts of baking and freezing needs.
Stacking the pans is a neat feature, too. When I’m done, I nest them together, saving a lot of space in my cluttered cabinet.
They’re lightweight but durable, promising long-term use. Overall, this tray makes baking, freezing, and cleanup hassle-free and efficient.
What Makes a Muffin Suitable for Freezing?
Several factors contribute to making a muffin suitable for freezing:
- Moisture Content: Muffins with higher moisture content tend to freeze better as they retain their texture and flavor after thawing. Ingredients like yogurt, applesauce, or mashed bananas can enhance moisture levels.
- Fat Content: The amount and type of fat used in muffins can affect their freezing quality. Muffins made with healthy fats, such as olive oil or avocado, often have better flavor retention and texture after being frozen.
- Flavor Profile: Certain flavors, such as chocolate chip or blueberry, tend to freeze well and maintain their taste after thawing. Conversely, muffins with delicate flavors or toppings may not fare as well in the freezer.
- Size and Shape: Smaller muffins or those that are individually sized freeze more efficiently than larger ones. This allows for quicker freezing and thawing, minimizing the risk of freezer burn.
- Cooling Before Freezing: Properly cooling muffins before placing them in the freezer is crucial. This prevents condensation from forming, which can lead to ice crystals and affect the muffin’s texture.
- Storage Method: Using airtight containers or freezer bags for storage helps prevent freezer burn and preserves the muffins’ freshness. It’s important to remove as much air as possible before sealing.
How Do Ingredients Affect Freezer Compatibility?
The compatibility of ingredients with freezing processes significantly impacts the quality and texture of muffins after thawing.
- Flour Type: Different types of flour, such as all-purpose, whole wheat, or gluten-free, can affect moisture retention in muffins. All-purpose flour generally yields a lighter texture, while whole wheat can lead to denser muffins, which may freeze well but could require longer thawing times.
- Fat Content: The type and amount of fat, such as butter or oil, play a crucial role in muffin moisture and tenderness. Muffins with higher fat content tend to freeze better as fat helps to preserve texture, but too much fat can lead to greasy results upon thawing.
- Eggs: Eggs contribute to the structure and moisture of muffins. When freezing muffins, eggs can help maintain a stable texture, but if overmixed or left in the batter for too long before freezing, they can cause a rubbery texture after thawing.
- Sweeteners: The choice of sweetener, whether sugar, honey, or maple syrup, can affect freezing compatibility. Some sweeteners retain moisture better than others, which can help in keeping muffins soft and flavorful after thawing.
- Add-ins: Ingredients such as fruits, nuts, or chocolate chips can alter the freezing process. Fresh fruits may release moisture when thawed, potentially leading to sogginess, while dried fruits or chocolate chips tend to freeze well without affecting the overall texture.
- Leavening Agents: The type and quantity of leavening agents like baking powder or baking soda influence the rise of muffins. Over-leavened muffins may collapse during freezing and thawing, while the right balance ensures that muffins retain their fluffy texture.
- Moisture Content: The overall moisture level in the muffin batter is critical for freezing. Muffins that are too wet may develop ice crystals and become mushy, while those with too little moisture might dry out during the freezing process.
Why is Texture Important for Freezing Muffins?
Research from the American Institute for Food Distribution suggests that the size of ice crystals formed during freezing plays a crucial role in determining texture. Smaller ice crystals, which are typically formed during rapid freezing, create less damage to the cellular structure of the muffins, preserving their fluffy texture. Conversely, slower freezing processes lead to larger ice crystals, which can puncture cell walls and result in a mushy product upon thawing.
The underlying mechanism involves the water content in the muffins. Muffins with higher moisture levels are more prone to texture changes during freezing. When water freezes, it expands, and if this expansion happens unevenly, it can compromise the integrity of the muffin’s crumb structure. Additionally, the presence of air pockets in the batter contributes to the lightness and tenderness of the muffin. If these air pockets collapse due to ice crystal formation, the final product can be less appealing. Therefore, understanding the balance of moisture and air in muffin recipes is essential for achieving the best freezer muffin quality.
What Are the Most Popular Freezer Muffin Recipes?
The most popular freezer muffin recipes offer convenience and deliciousness, perfect for quick breakfasts or snacks.
- Banana Muffins: These moist and flavorful muffins are made with ripe bananas, providing natural sweetness and a soft texture. They freeze well, retaining their taste and moisture, making them a favorite for busy mornings.
- Blueberry Muffins: Bursting with fresh or frozen blueberries, these muffins are a classic choice that balances sweetness with a hint of tartness. Their vibrant color and delightful taste make them a hit, and they freeze beautifully without losing their juiciness.
- Chocolate Chip Muffins: A favorite among both kids and adults, these muffins are packed with chocolate chips that melt during baking, creating a rich, indulgent treat. They freeze well, making them perfect to have on hand for an easy dessert or snack.
- Apple Cinnamon Muffins: Combining the flavors of sweet apples and warm cinnamon, these muffins are cozy and comforting. They freeze exceptionally well, allowing the spices to meld, which enhances their flavor when reheated.
- Carrot Muffins: Loaded with grated carrots and often enhanced with walnuts or raisins, these muffins are a nutritious option that doesn’t compromise on taste. Their hearty texture holds up well in the freezer, making them a great addition to your meal prep.
- Pumpkin Muffins: Perfect for fall, these muffins are made with pumpkin puree and warming spices like nutmeg and cinnamon. They freeze well, maintaining their moistness and flavor, making them a seasonal favorite that can be enjoyed year-round.
- Zucchini Muffins: These muffins are a great way to incorporate vegetables into your diet, with shredded zucchini adding moisture and nutrition. They freeze nicely, and their subtle flavor pairs well with chocolate chips or nuts for added texture.
Which Flavor Combinations Work Best for Freezing?
The best flavor combinations for freezing muffins ensure that they retain their taste and texture after thawing.
- Blueberry and Lemon: This combination offers a refreshing contrast between the sweet and tart flavors. The acidity from the lemon enhances the blueberries, and both ingredients freeze well, helping maintain moisture and flavor during storage.
- Chocolate Chip and Peanut Butter: This decadent pairing is a favorite among many. The rich, nutty flavor of peanut butter complements the sweetness of chocolate chips, and both ingredients freeze beautifully, providing a delightful treat once thawed.
- Banana and Walnut: Bananas add natural sweetness and moisture to muffins, while walnuts provide a satisfying crunch. When frozen, this combination retains its flavor and texture, making it a popular choice for breakfast or snacks.
- Cinnamon and Apple: The warmth of cinnamon paired with the sweetness of apples creates a comforting flavor profile. This combination not only freezes well but also makes for a fragrant muffin that will remind you of homemade pies when thawed.
- Carrot and Raisin: This healthy option combines the earthiness of carrots with the sweetness of raisins, creating a nutritious muffin. The moisture from the carrots helps keep the muffins tender, and this combination freezes exceptionally well.
- Pumpkin and Spice: A classic fall flavor, pumpkin pairs wonderfully with spices like nutmeg and cinnamon. These muffins freeze well, retaining their moist texture and rich flavor, making them perfect for enjoying any time of the year.
How Can Moisture Retention Be Achieved in Freezer Muffins?
Moisture retention in freezer muffins can be achieved through several effective techniques:
- Ingredient Choice: Selecting ingredients that naturally retain moisture, such as yogurt or applesauce, can significantly enhance the moisture content of muffins. These ingredients not only help keep the muffins moist but also contribute to a tender texture, making them more enjoyable after freezing.
- Proper Mixing Technique: Avoid overmixing the batter, as this can lead to a denser muffin and loss of moisture. Gentle folding of the dry and wet ingredients helps to incorporate air while maintaining the muffin’s lightness, which is crucial for moisture retention during freezing and reheating.
- Cooling and Wrapping: Allow muffins to cool completely before wrapping them tightly in plastic wrap or aluminum foil. This prevents condensation from forming, which can lead to sogginess, and ensures that the muffins maintain their moisture without freezer burn.
- Freezing Method: Flash freezing muffins individually before placing them in a sealed container or freezer bag can help preserve moisture. This method allows for quicker freezing, which helps retain the texture and moisture of the muffins when they are thawed later.
- Thawing Process: Thawing muffins at room temperature or in the microwave rather than in the fridge helps retain moisture. Quick reheating in the microwave can also reintroduce some moisture, making the muffins taste freshly baked.
What Are the Best Practices for Freezing Muffins?
The best practices for freezing muffins ensure they maintain their quality and taste when reheated.
- Cool Completely Before Freezing: Allow muffins to cool at room temperature for at least 30 minutes after baking. This prevents condensation from forming inside the storage container, which can lead to freezer burn and texture changes.
- Wrap Individually: Wrap each muffin tightly in plastic wrap or aluminum foil. This individual wrapping helps to keep air out and prevents the muffins from sticking together, making it easier to grab one or two at a time without thawing the entire batch.
- Use Airtight Containers or Freezer Bags: Place the wrapped muffins in an airtight container or a heavy-duty freezer bag. Removing as much air as possible from the bag before sealing helps to prevent freezer burn and preserves freshness.
- Label and Date: Always label your containers or bags with the date and type of muffin. This helps you keep track of how long the muffins have been frozen, ensuring you consume them while they are still at their best quality, ideally within three months.
- Thaw Properly: To enjoy muffins at their best after freezing, thaw them in the refrigerator overnight or at room temperature for a few hours. This gradual thawing helps maintain the muffins’ texture and moisture.
How Should Muffins Be Prepared for Successful Freezing?
To successfully freeze muffins, certain preparation steps should be followed to maintain their quality and taste.
- Choose the Right Muffin Recipe: Opt for muffins that freeze well, such as banana, blueberry, or chocolate chip. These varieties tend to maintain their flavor and texture after thawing.
- Cool Before Freezing: Allow the muffins to cool completely at room temperature before freezing them. This prevents condensation from forming, which can lead to freezer burn.
- Wrap Individually: Wrap each muffin tightly in plastic wrap or aluminum foil to prevent exposure to air. This helps maintain their moisture and prevents them from absorbing odors from other foods in the freezer.
- Use Freezer Bags: After wrapping, place the muffins in a labeled freezer-safe zip-top bag. Remove as much air as possible to further protect against freezer burn and to keep the muffins fresh.
- Freeze in Batches: If you have a large quantity of muffins, consider freezing them in smaller batches. This makes it easier to thaw only what you need without exposing the entire batch to air and temperature changes.
- Thawing Method: When ready to enjoy, thaw muffins at room temperature or heat them in the microwave for a quick defrost. For the best texture, you can also briefly warm them in an oven.
Which Storage Methods Keep Muffins Freshest?
The main storage methods to keep muffins freshest include freezing, refrigeration, and room temperature storage.
- Freezing: Freezing is widely considered the best method for long-term storage of muffins, preserving their texture and flavor. To freeze muffins, wrap them tightly in plastic wrap or aluminum foil and place them in an airtight container or freezer bag, which prevents freezer burn and maintains moisture.
- Refrigeration: Refrigerating muffins can extend their shelf life for a few days but may alter their texture, making them denser or drier. It’s best to store muffins in an airtight container to minimize exposure to air and moisture while keeping them away from ingredients that could introduce unwanted flavors.
- Room Temperature Storage: Storing muffins at room temperature is suitable for short-term use, typically lasting 1-3 days. To keep them fresh, place them in a sealed container or a zip-lock bag, ensuring they are completely cooled before storage to prevent condensation and sogginess.
How Should Frozen Muffins Be Reheated?
To enjoy frozen muffins at their best, consider the following reheating methods:
- Microwave: This is the quickest method for reheating frozen muffins. Simply place the muffin on a microwave-safe plate and heat it on high for 30 seconds to 1 minute, checking to ensure it’s warm throughout; it may become slightly soggy but will retain moisture.
- Oven: Reheating muffins in the oven provides a crispier exterior and a freshly baked texture. Preheat your oven to 350°F (175°C), place the muffins on a baking sheet, and heat for about 10-15 minutes; this method is excellent for restoring that bakery-fresh quality.
- Toaster Oven: A toaster oven is a great alternative to a traditional oven, especially for smaller batches. Set the toaster oven to 350°F (175°C), place the muffins inside, and toast for about 5-10 minutes, monitoring closely to prevent over-browning.
- Air Fryer: Using an air fryer can give muffins a delightful crispiness while reheating. Preheat the air fryer to 300°F (150°C) and place the muffin inside for about 5-7 minutes, flipping halfway through to ensure even heating.
- Defrosting at Room Temperature: For those who prefer a gentler method, letting the muffins sit at room temperature for an hour or two allows them to defrost gradually. This method helps maintain their texture, making them perfect for a slow morning treat.
What Techniques Preserve Freshness During Reheating?
Several techniques can be employed to preserve freshness during reheating.
- Thawing in the Refrigerator: This method involves moving frozen muffins from the freezer to the refrigerator several hours or overnight before reheating. Thawing slowly helps to maintain moisture and prevents the muffins from becoming dry or rubbery when warmed.
- Using the Oven: Reheating muffins in the oven at a low temperature (around 350°F) for about 10-15 minutes helps to retain their texture and flavor. The dry heat of the oven allows for even heating, which helps to crisp the exterior while keeping the inside soft and moist.
- Microwave with a Damp Paper Towel: If you’re short on time, microwaving muffins for a short period while covering them with a damp paper towel can help preserve moisture. The steam generated by the damp paper towel prevents the muffins from drying out, ensuring they remain soft and enjoyable.
- Freezing Individually: Before freezing, wrap each muffin tightly in plastic wrap or aluminum foil to minimize air exposure. This method not only preserves freshness but also allows for easy reheating of individual portions without having to defrost the entire batch.
- Storing in Airtight Containers: When storing muffins in the freezer, using airtight containers or freezer bags can help prevent freezer burn. This technique keeps the muffins fresh by reducing exposure to air and moisture, which can degrade their quality over time.
Which Reheating Methods Are Most Effective?
The most effective reheating methods for muffins from the freezer include:
- Microwave: Quickly reheating muffins in the microwave is convenient and allows for a soft texture.
- Oven: Using the oven can help maintain a crispy exterior and warm interior for a fresh-from-the-bakery feel.
- Toaster Oven: This method combines the benefits of the microwave and the oven, providing a quick yet effective reheating option.
- Steamer: Steaming muffins can retain moisture and softness, making it an excellent choice for muffins that tend to dry out.
The microwave is a popular choice for reheating frozen muffins due to its speed and efficiency. Simply place the muffin on a microwave-safe plate, cover it with a damp paper towel, and heat in short intervals to prevent overcooking. This method can quickly restore warmth and softness, making it a favorite for busy mornings.
The oven is another effective method for reheating muffins, especially if you want to bring back a crispy outer layer. Preheating the oven to around 350°F (175°C) and placing muffins on a baking sheet for about 10-15 minutes allows them to heat evenly while becoming slightly crunchy on the outside. This method is ideal for preserving the texture and flavor of the muffins.
The toaster oven offers a middle ground between the microwave and the oven, allowing you to reheat muffins with less energy consumption and time than a full oven. It can provide a nice balance of warmth and crispness, making it suitable for muffins that might lose their appeal in the microwave. Set it to a moderate temperature, and keep an eye on the muffins to ensure they don’t overheat.
Steaming is an often-overlooked method that can infuse moisture back into muffins, preventing them from becoming dry. By placing muffins in a steamer basket over boiling water for a few minutes, you can achieve a delightful softness. This method is particularly effective for denser muffins or those filled with fruits or nuts that may require extra moisture to regain their original texture.
Related Post: